Operating system installation
This guide explains how to write an OS image to the Pigeon computer’s eMMC storage.
Download
The latest official OS image for all Pigeon computers is:
2024-06-11-raspios-pigeon.img.xz
Release date: June 11, 2024
System: 32-bit
Kernel version: 6.6.31
Debian version: 12 (bookworm)
Firmware version: 4942b7633c0ff1af1ee95a51a33b56a9dae47529
Size: 572 MB
SHA256 file integrity hash: f9eb0ee0b70a1437bb73c3920deb0c3ff35753e61f624637ca3605101df8423d
Previous files:
- 2021-10-30-raspios-bullseye-armhf-lite-pigeon.zip
- 2021-10-28-raspios-buster-armhf-lite-Pigeon.zip
- 2020-02-13-raspbian-buster-lite-RB100.zip
- 2020-02-13-raspbian-buster-lite-RB300.zip
- 2018-03-13-raspbian-stretch-lite-Pigeon-RB100.zip
- 2018-03-13-raspbian-stretch-lite-Pigeon-RB300.zip
- 2017-04-10-raspbian-jessie-Pigeon-RB100-v2.zip
- 2017-04-10-raspbian-jessie-Pigeon-RB300-v2.zip
- 2017-04-10-raspbian-jessie-Pigeon-RB100.zip
- 2017-04-10-raspbian-jessie-Pigeon-RB300.zip
- 2017-03-02-raspbian-jessie-Pigeon-RB100.7z
- 2017-03-02-raspbian-jessie-Pigeon-RB300.7z
- 2016-11-07-raspbian-jessie-Pigeon-RB100.7z
- 2016-11-07-raspbian-jessie-Pigeon-RB300.7z
- 2016-03-18-raspbian-jessie-Pigeon-RB100.7z
For Windows users
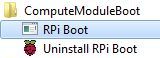
1. Download and run the rpiboot_setup.exe to install the drivers and boot tool.
2. Connect your host PC’s USB to the Pigeon USB DEVICE port.
3. Apply power to the Pigeon. Windows should now detect the hardware and proceed to install the driver. The LED ACT should be illuminated.
4. Once the driver installation is complete, run the RPiBoot.exe tool that was previously installed. The LED ACT should turn off.
5. After a few seconds, the Pigeon will appear under Windows as a disk (USB mass storage device).
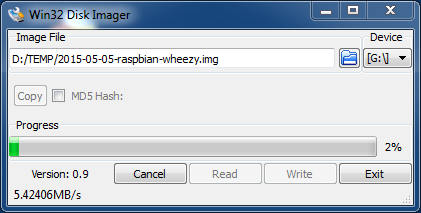
6. Use Win32DiskImager to write the OS image to the boot drive.
7. Once you have written an OS image, ensure that nothing is plugged into the USB device port.
8. Power cycle the Pigeon.
9. This step is necessary only in older system images. In the newest one, it will be done automatically upon the first boot, and you can skip it. Log in (user: root, password: kristech) and enter the command “raspi-config”. Select “Expand Filesystem” and then exit from raspi-config. Reboot the system.
For Linux users
1. Install libusb and Raspberry tools
sudo apt install git libusb-1.0-0-dev pkg-config build-essential
git clone --depth=1 https://github.com/raspberrypi/usbboot
cd usbboot
make
sudo ./rpiboot
2. Plug your host PC USB into the Pigeon USB DEVICE port.
3. Apply power to the Pigeon and the rpiboot tool will discover the Pigeon.
4. You will see a new device appear. This is commonly /dev/sdb but it could be another location such as /dev/sdc, so check it carefully in /dev/ before you will write the OS image.
5. Write the OS image:
sudo dd if=os_image.img of=/dev/sdb bs=4MiB
sudo sync
6. Once you have written the OS image, make sure nothing is plugged into the USB device port.
7. Power cycle the Pigeon.
8. This step is necessary only in older system images. In the newest one, it will be done automatically upon the first boot, and you can skip it. Log in (user: root, password: kristech) and enter the command “raspi-config”. Select “Expand Filesystem” and then exit from raspi-config. Reboot the system.
Overlay filesystem
If you want to protect the filesystem from writes, consider using the Overlay filesystem. When the overlay filesystem is enabled, any data generated after startup is only saved in RAM and will be lost upon reboot.
Links
1) Raspberry documentation – Flashing the Compute Module eMMC
2) Win32DiskImager